Bicho-Bicho Recipe: Easy Filipino-Style Donuts
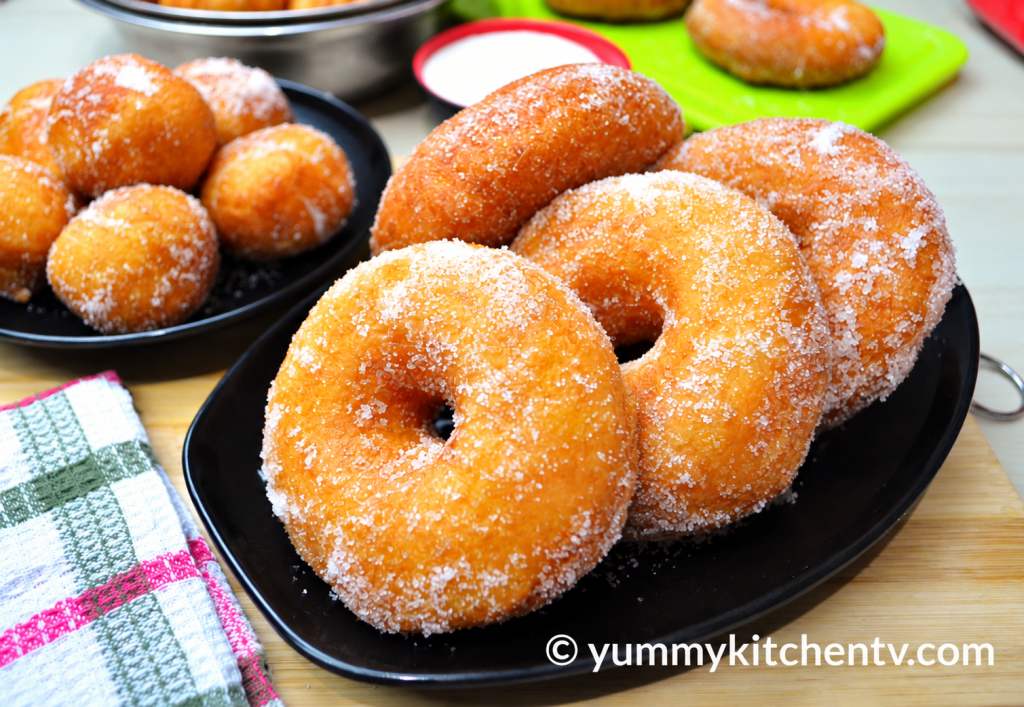
Bicho-Bicho is a classic Filipino fried doughnut made with a soft, lightly sweetened yeast dough and coated generously with sugar. Simple, affordable, and delicious, these homemade Pinoy donuts are a nostalgic merienda that many Filipinos remember from neighborhood bakeries and street vendors.


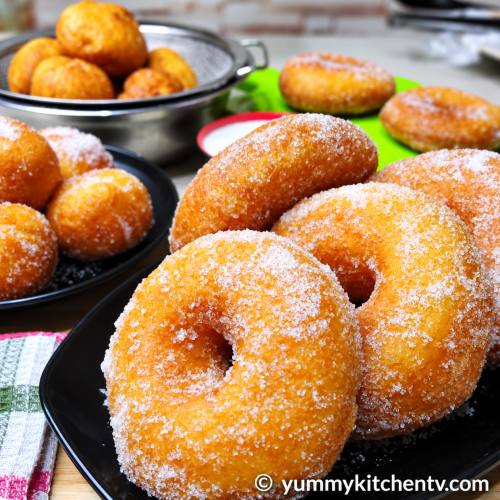
Bicho-Bicho (Filipino-Style Donuts)
Equipment
- Mixing bowls
- Measuring cups and spoons
- Rolling Pin
- Baking tray
- Wax paper or parchment paper
- Clean kitchen towel
- Deep frying pan
- Tongs or slotted spoon
- Strainer or paper towels
Ingredients
- 3¼ cups all-purpose flour
- 2 tablespoons active dry yeast
- 1 cup warm milk
- 3 tablespoons white sugar
- 1 medium-sized egg
- 2 tablespoons softened butter or cooking oil
- ¼ teaspoon salt
- Oil for deep-frying
- White sugar for coating
Instructions
Activate the Yeast
- Pour the warm milk into a bowl. Add the sugar and active dry yeast. Mix well and let it sit for about 5 minutes, or until foamy.
Make the Dough
- In a large mixing bowl, combine the flour and salt. Add the yeast mixture, egg, and softened butter or oil.
- Mix until a dough forms. Transfer to a lightly floured surface and knead until the dough becomes smooth and manageable. Add a small amount of flour if needed.
Let the Dough Rise
- Place the dough in a clean bowl and cover with plastic wrap or a kitchen towel. Let it rest in a warm place for about 1 hour, or until it has noticeably increased in size.
Shape the Dough
- Transfer the risen dough to a floured surface and knead for about 5 minutes.
- Flatten the dough with a rolling pin and cut into your preferred shapes. You can make traditional doughnut rings, rectangles, squares, or hearts.
- Place the shaped dough on a lined baking tray.
Second Rise
- Cover the shaped dough with a clean cloth and let it rest for another 20 minutes.
Fry
- Heat enough oil for deep-frying over medium heat.
- Carefully place the doughnuts into the hot oil in batches. Fry until golden brown, turning them as needed for even cooking.
- Remove from the oil and drain using a strainer or paper towels.
Coat With Sugar
- While the bicho-bicho is still warm, roll each piece in white sugar until generously coated.
- Serve warm and enjoy!
Notes
- Make sure the milk is warm, not hot, when activating the yeast.
- The yeast mixture should become foamy after several minutes. This indicates that the yeast is active.
- Avoid adding too much flour while kneading. Excess flour can make the doughnuts dense.
- Allow enough time for both rises to achieve soft and fluffy bicho-bicho.
- Keep the frying temperature controlled. Oil that is too hot can brown the outside too quickly.
- Fry in small batches to prevent the oil temperature from dropping.
- Coat the bicho-bicho with sugar while still warm so the sugar sticks well.
- You can use cinnamon sugar, powdered sugar, chocolate glaze, or other toppings instead of plain sugar.
- For a modern twist, fill the doughnuts with cheese or chocolate before shaping and frying.
- Bicho-bicho is best served warm and fresh, especially as a classic Filipino merienda.
Nutrition
Bicho Bicho Recipe Video
Unlike the glazed doughnuts commonly found in modern doughnut shops, traditional bicho-bicho is usually much simpler. The dough can be shaped into rings, rectangles, squares, hearts, or other fun forms before being deep-fried until golden brown. A generous coating of white sugar gives the finished doughnut its familiar sweetness.
This easy bicho-bicho recipe is perfect for home cooks who want to recreate a beloved Filipino snack using basic ingredients.

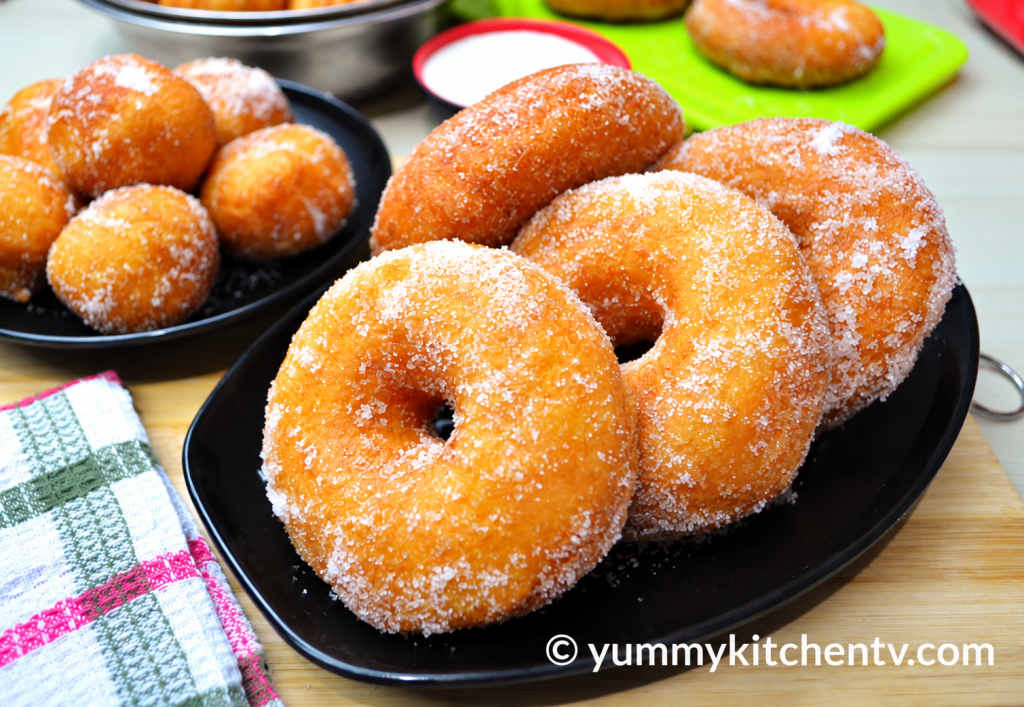
What Is Bicho-Bicho?

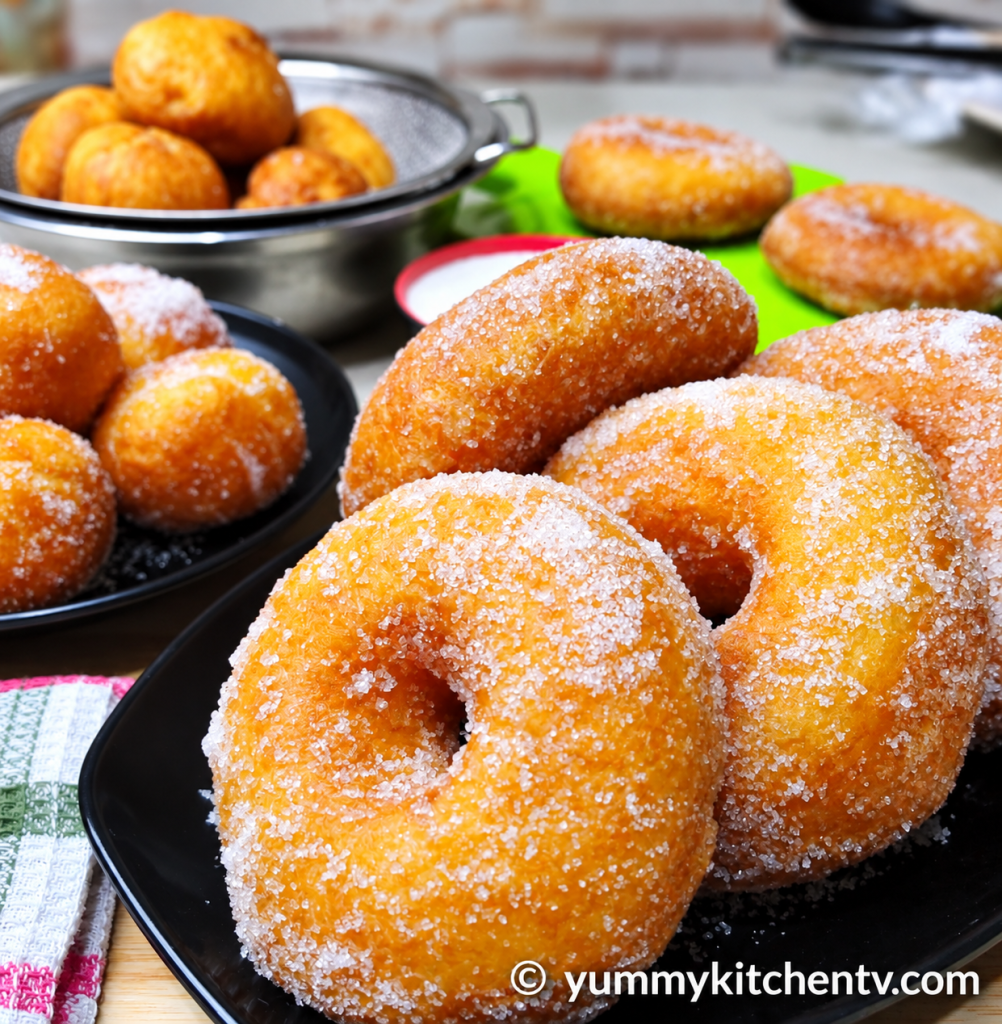
Bicho-bicho is a Filipino-style fried doughnut made from yeast-leavened dough. It is typically prepared with flour, yeast, milk, sugar, egg, butter or oil, and salt. After the dough rises, it is flattened, shaped, and deep-fried until golden.
The freshly fried doughnuts are then coated with sugar while still slightly warm, allowing the sugar to stick to the surface.
Bicho-bicho is commonly associated with Filipino merienda and local bakeries. It is especially nostalgic for people who remember buying freshly fried snacks from neighborhood vendors in the afternoon.
Some modern versions are filled with cheese, chocolate, or other sweet fillings, but the classic sugar-coated version remains a favorite.
Why You’ll Love This Bicho-Bicho Recipe
There is something wonderfully simple about homemade bicho-bicho.
It’s budget-friendly. Most of the ingredients are everyday pantry staples.
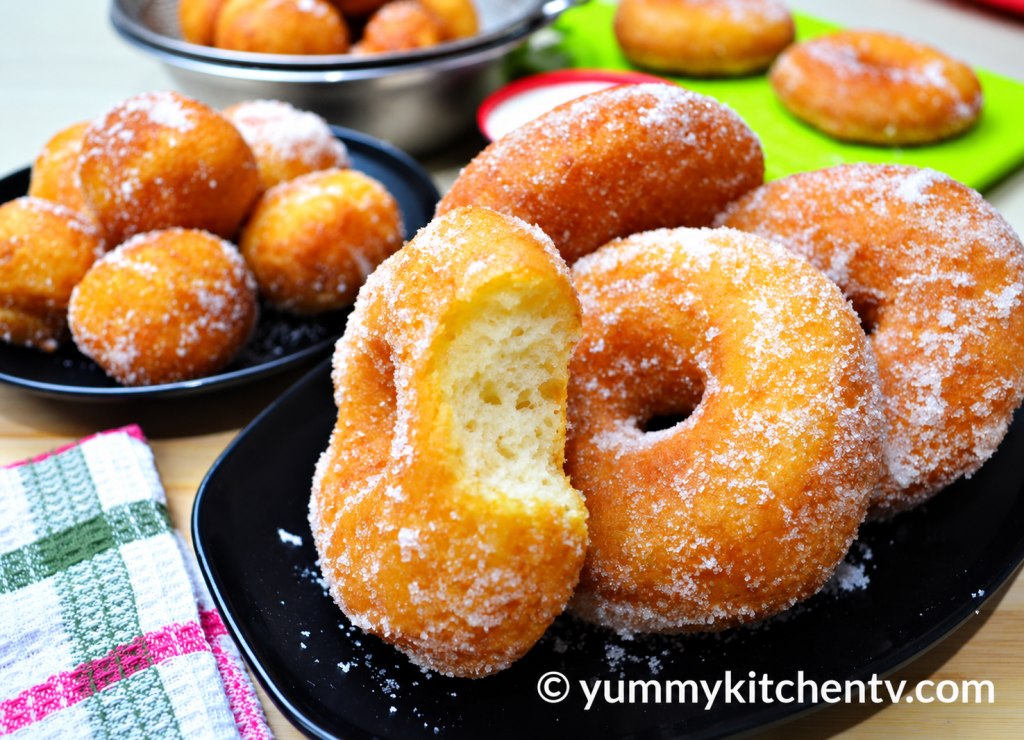
It’s soft and fluffy. Yeast gives the dough a light texture after rising and frying.
It’s easy to customize. You can make rings, hearts, squares, rectangles, or any shape you like.
It’s perfect for merienda. Serve it warm with coffee, milk, hot chocolate, or your favorite drink.
It’s nostalgic. For many Filipino families, bicho-bicho brings back memories of neighborhood bakeries and afternoon snacks.

Ingredients
For this recipe, you’ll need:
- 3¼ cups all-purpose flour
- 2 tablespoons active dry yeast
- 1 cup warm milk
- 3 tablespoons white sugar
- 1 medium-sized egg
- 2 tablespoons softened butter or cooking oil
- ¼ teaspoon salt
- Oil, for deep-frying
- White sugar, for coating
The ingredients are simple, but proper handling of the yeast and dough is important for achieving soft and fluffy bicho-bicho.
How to Make Bicho-Bicho
1. Activate the Yeast
Start by placing the warm milk in a bowl. Add the sugar and active dry yeast, then stir until combined.
Let the mixture sit for about 5 minutes, or until it becomes foamy.
The milk should be warm rather than hot. Very hot liquid can damage the yeast and prevent the dough from rising properly.
2. Make the Dough
In a large mixing bowl, combine the all-purpose flour and salt.
Pour in the yeast mixture, then add the egg and softened butter or oil. Mix everything together until a dough begins to form.
Transfer the dough to a lightly floured surface and knead until it becomes soft and manageable. Add a little flour as needed if the dough is excessively sticky, but avoid adding too much because this can make the finished bicho-bicho dense.
Continue kneading until the dough is smooth and no longer sticks excessively to your hands or the bowl.
3. Let the Dough Rise
Place the dough in a clean bowl and cover it with plastic wrap or a clean kitchen towel.
Let it rest in a warm place for about 1 hour.
During this time, the yeast will cause the dough to expand. The dough should become noticeably larger, ideally close to double its original size.
4. Shape the Dough
Once the dough has risen, transfer it to a lightly floured surface.
Knead it again for about 5 minutes to release some of the air.
Flatten the dough using a rolling pin until it reaches a manageable thickness.
Now comes the fun part: shaping your bicho-bicho.
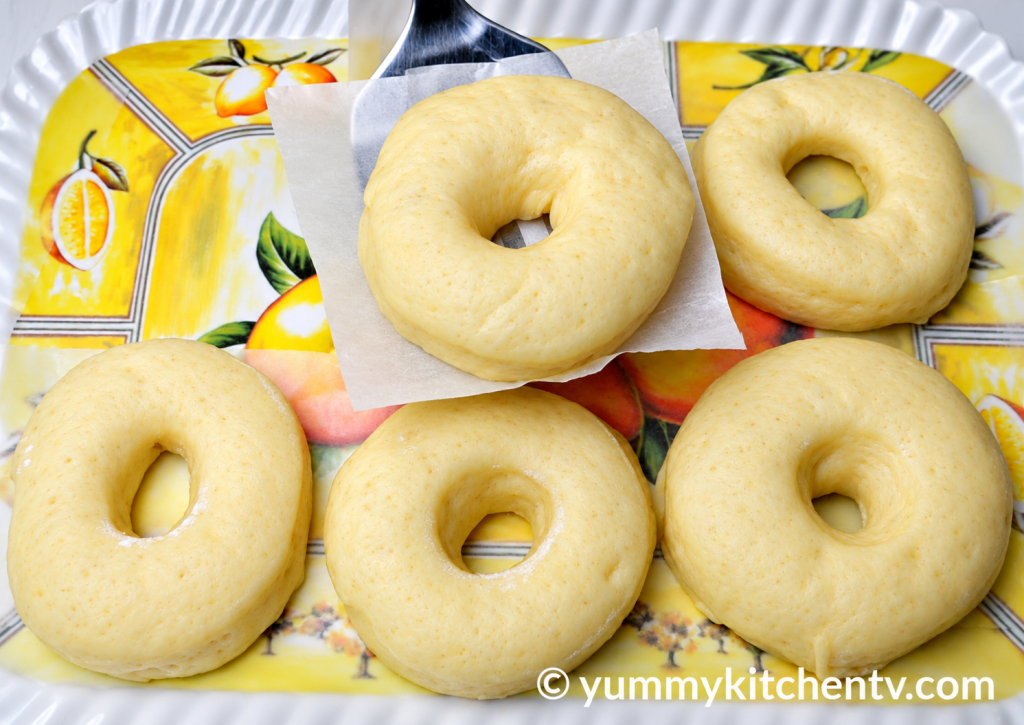
You can cut the dough into traditional doughnut rings, rectangles, squares, or even heart shapes. Remove the excess dough and reshape it with the remaining dough.
Place the shaped pieces on a baking tray lined with wax or parchment paper.

5. Let the Dough Rise Again
Cover the shaped doughnuts with a clean cloth and let them rest for about 20 minutes.
The dough will puff up slightly during this second resting period. This helps produce lighter and softer fried doughnuts.
6. Fry the Bicho-Bicho
Heat enough oil for deep-frying in a deep pan over medium heat.
Carefully place the shaped dough into the hot oil. Fry in batches rather than overcrowding the pan.
If you’re using individual pieces of wax paper underneath the dough, you can carefully place the dough into the oil with the paper facing down. After the bottom has cooked for a short time, the paper should release easily and can be removed with tongs.
Fry the bicho-bicho until golden brown on one side, then carefully turn it over and cook the other side.
Once evenly golden, remove the doughnuts and place them in a strainer or on paper towels to drain excess oil.
7. Coat With Sugar
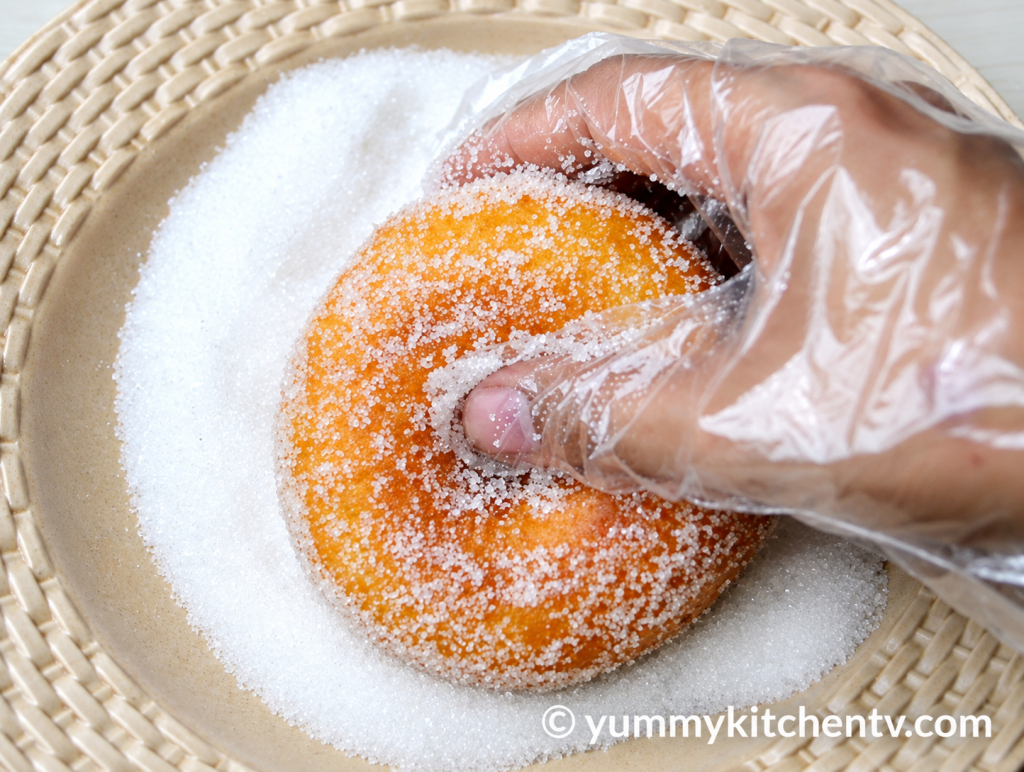
While the bicho-bicho is still warm, roll each piece generously in white sugar.
The slight warmth and remaining surface moisture help the sugar adhere to the doughnut.
Serve immediately and enjoy!

Tips for Making Soft Bicho-Bicho
Use warm milk. The milk should feel comfortably warm, not hot, when activating the yeast.
Give the dough enough time to rise. Proper fermentation is important for achieving a fluffy texture.
Don’t add too much flour. Although sticky dough can be difficult to knead, adding excessive flour can make the finished doughnuts heavy.
Knead properly. Kneading develops the dough’s structure and helps create a soft, elastic dough.
Don’t skip the second rise. Allowing the shaped dough to rest before frying helps create lighter doughnuts.
Control the oil temperature. If the oil is too hot, the outside can brown before the inside is fully cooked. If it is too cool, the dough can absorb too much oil.
Don’t overcrowd the pan. Frying too many pieces at once can lower the oil temperature and result in greasy doughnuts.
How to Shape Bicho-Bicho
One of the charming things about homemade bicho-bicho is that you aren’t limited to one shape.
Traditional doughnut rings are easy to make, but you can also cut the dough into rectangles or squares. Heart-shaped bicho-bicho can be especially fun when preparing them for children.
If you’re making them with kids, allow them to help choose the shapes. Just make sure an adult handles the hot oil and frying.
You can also experiment with filled versions. Cheese and chocolate are popular additions to modern Filipino-style bicho-bicho.

What to Serve With Bicho-Bicho
Freshly fried Filipino doughnuts are delicious on their own, but they’re even better with a hot or cold drink.
Serve them with coffee for an afternoon snack, or pair them with hot chocolate or milk for children.
You can also serve bicho-bicho with additional sugar, cinnamon sugar, chocolate sauce, or a simple glaze.
For a classic experience, though, nothing beats a warm bicho-bicho generously coated in white sugar.
Frequently Asked Questions
Why didn’t my bicho-bicho rise?
The yeast may have been inactive, or the milk may have been too hot or too cold. Make sure your yeast becomes foamy after sitting in warm milk with sugar.
Can I use butter instead of oil?
Yes. Softened butter can be used in the dough. It adds a richer flavor, while cooking oil produces a slightly lighter dough.
Can I make bicho-bicho without eggs?
Eggs contribute to the texture and richness of the dough. While substitutions are possible, they can change the final result. For this recipe, it’s best to follow the listed ingredients.
Can I use other coatings?
Absolutely. White sugar is the classic choice, but cinnamon sugar, powdered sugar, chocolate glaze, or melted chocolate can also be used.

Final Thoughts
Bicho-Bicho may be a simple Filipino doughnut, but its appeal goes far beyond its ingredients. Soft, fluffy dough, a golden fried exterior, and a generous coating of sugar make it an irresistible Filipino merienda.
It’s also a wonderful recipe to make at home because you can shape the dough however you like and even experiment with different coatings and fillings.
Whether you grew up eating bicho-bicho from a neighborhood vendor or you’re discovering this Filipino snack for the first time, this homemade version is worth trying. Serve it warm, share it with the family, and enjoy a delicious taste of classic Filipino merienda.