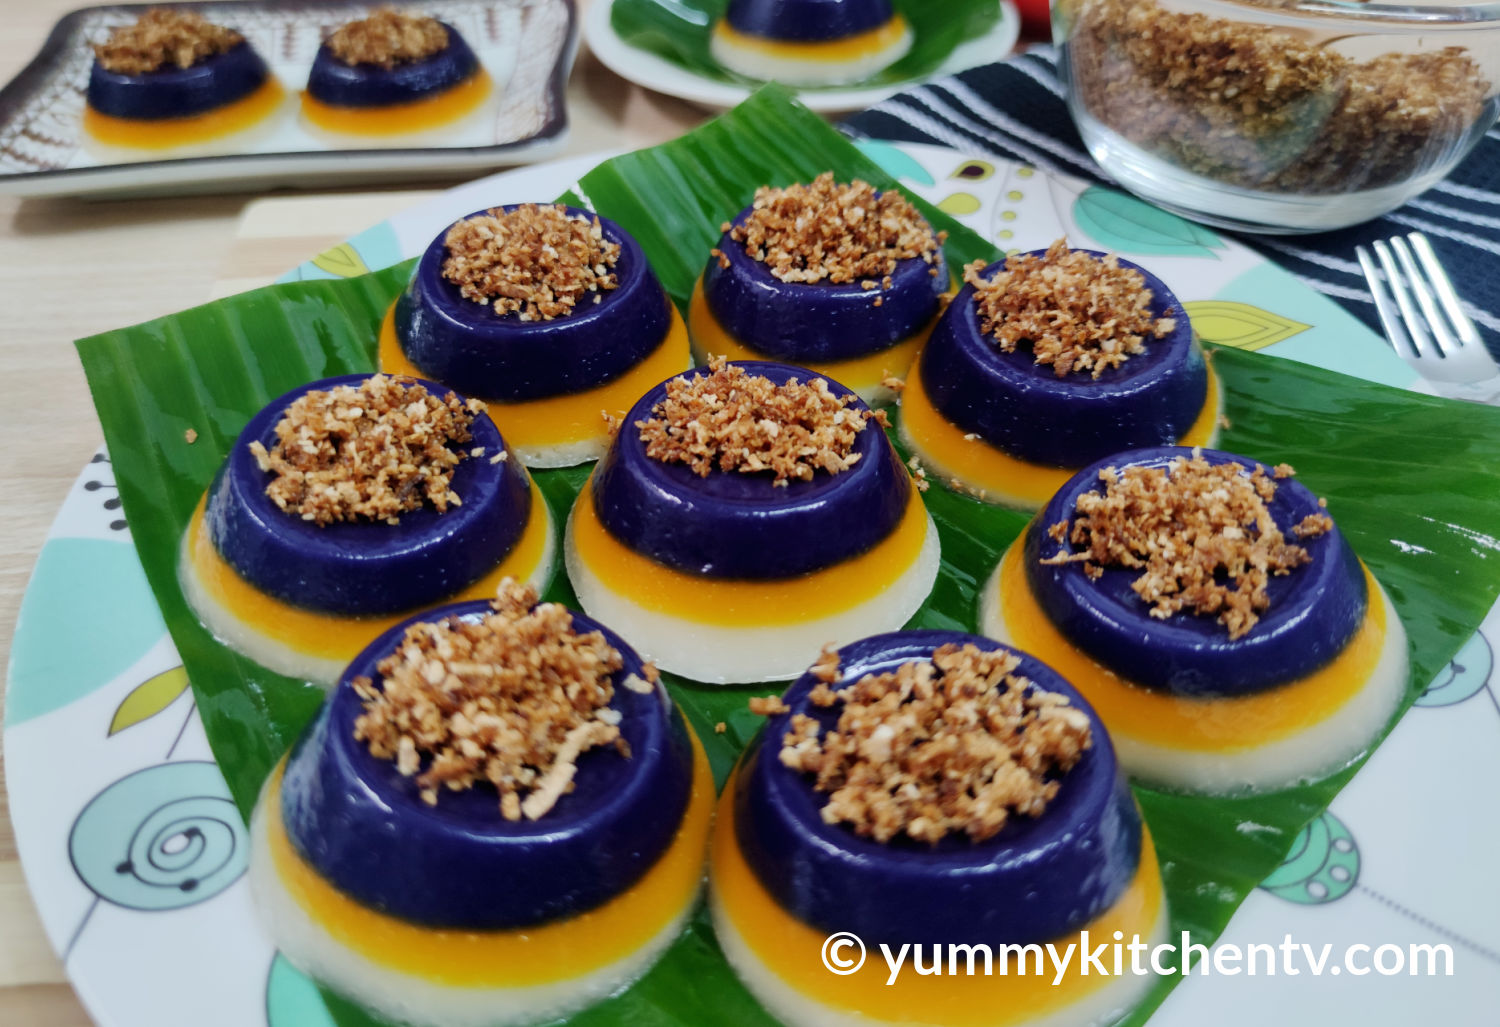
Sapin-Sapin
Sapin-sapin is a Filipino Layered dessert made by steaming different colour cake mixture consist of rice flour, coconut milk, condensed milk, sugar and water, layer by layer. It is usually topped up with latik (caramelised coconut flakes) before serving. Traditional sapin-sapin recipe calls for different flavours combined in each layer, such as ube halaya in the purple layer, jackfruit in the yellow or orange layer and the white layer has no flavourings. The consumer version appears to have only food coloring and no additional flavoring to minimize costs.

Sapin-Sapin
18
servingsIngredients
- Budbod Toppings:
1 cup Desiccated Coconut
2 tablespoon White Sugar
- Sapin sapin mixture:
2 cup Glutinous rice flour (malagkit powder)
1 cup Rice flour (giniling na bigas)
½ cup White Sugar
2 ½ cup Coconut Milk
1 cup Condensed Milk
1 tsp Food coloring (for each color)
Oil (for greasing)
Banana leaf (optional)
Directions
- Budbod toppings:
- In a pan, cook the desiccated coconut in low heat until it turns to light brown. Stir constantly to avoid burning.
- Once the desiccated coconut turns to light brown, add white sugar and cook for more minutes until it becomes brown. Stir constantly for even color.
- Once it turns to brown, remove from heat and let it cool completely. Set aside.
- Sapin-sapin Mixture:
- Place and combine the glutinous rice flour (malagkit powder), rice flour (giniling na bigas),and white sugar in a bowl and mix well.
- Add coconut milk and mix well. Add condensed milk and mix well until well combined.
- Strain the mixture to remove the lumps.
- Divide the mixture into 3 equal parts or depending on how many layers you want.
- Add food coloring or flavoring to each later. I used 1 tsp of violet food color, 1 tsp of yellow food color and the last one I leave it as the color white.
- Let it rest for 30 minutes before steaming for smoother texture.
- Grease each plastic molder with oil to prevent the mixture from sticking. Arrange the molders in a steamer. Put around 1 tablespoon of one colored-layer on each molder. Make sure that each layer is equal.
- Place a cloth in the steamer lid to prevent water from dripping while steaming. Make sure that the water of your steamer was already boiling.
- First layer should be steamed first for about 8 minutes in medium heat. If using a larger or bigger molder or container, steam it longer.
- After 8 minutes, poke a toothpick to test the first layer. The toothpick must come out clean.
- For second layer, I place the yellow colored mixture in a squeeze bottle for easier addition of each layer. If your do not have a squeeze bottle, you may use a measuring cup or ice cream scooper. Add equal part for the second layer on top of the first layer of sapin sapin and cover it. Steam the second layer for 10 minutes in medium heat.
- After 10 minutes, add the third or last layer of your sapin sapin mixture and cover it then steam it for 15 minutes in medium heat.
- Once it is completely cooked, remove from heat and let it cool completely before unmolding the sapin sapin.
- Grease the plate or place a banana leaf before putting the sapin sapin to prevent from sticking on the plate.
- Add the budbod toppings or you may also use a latik. Serve it and enjoy!
WHAT IS SAPIN SAPIN?


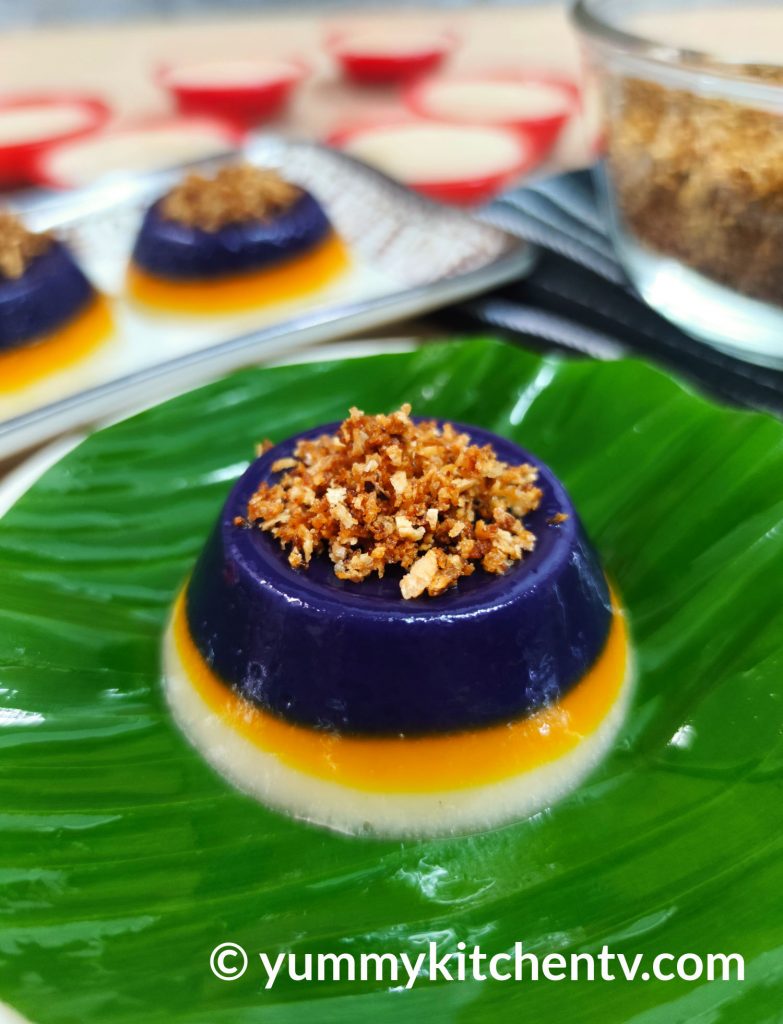
Sapin-sapin is a traditional layered rice cake dessert and Traditional sapin-sapin recipe calls for different flavors combined in each layer, such as ube halaya in the purple layer, jackfruit in the yellow or orange layer, but the white layer has no flavourings. The consumer version appears to have only food coloring and no additional flavoring to minimize costs.
Sapin-sapin is a sticky rice cake from the Philippines, originated in the northern province of Abra. The name comes from the word sapin, which means sheets or layers, and is also the main characteristic of this rice cake, its vibrant multicolored layers. It is made of steamed glutinous rice flour served with latik and/or toasted coconut. Usually made from 3 to 4 layers with a slight modification in taste and texture.
HOW TO MAKE RICE FLOUR
Every cup of raw rice will yield almost 1 ¼ cup of sifted rice flour.
- Rinse the rice thoroughly under cold running water. Drain it then put the rice into a bowl and cover the cold water. Soak for 3 (minimum) to 6 (maximum) hours.’
- Drain the rice in a fine-mesh strainer for about 10-15 minutes. Spread the rice out on a triple layer of paper towels to dry for an hour. The rice should be just slightly damp, not wet.
- Use a blender or food processor to grind the rice. Begin with the pulse setting by allowing the rice to settle in between 3 seconds pulses. When the rice has broken down into small granules, blend in high until the texture is powder-fine. Repeat this process until all the rice has been finely ground.
- Heat a large skillet over medium heat then add the rice flour to the pan. Stir constantly until all of the steam has evaporated and continue cooking for a couple more minutes. The resulting flour should look like snow white. If it begins to brown, immediately lift the pan up and lower the heat.
- To test for doneness or dryness, take a pinch between your fingers. A proper dried flour will not stick together. Remove from heat and cool to room temperature.
- Sift the rice flour and return any residual “clumps” back into your blender or food processor for processing then sift again.
sapin sapin recipe
This sapin sapin recipe will show you how to make sapin sapin with step by step procedure, ingredients list and we embedded a sapin sapin recipe video for you to watch. This is an authentic sapin sapin recipe and will help you to cook best sapin sapin for your family and guests

WHAT IT IS MADE OF?
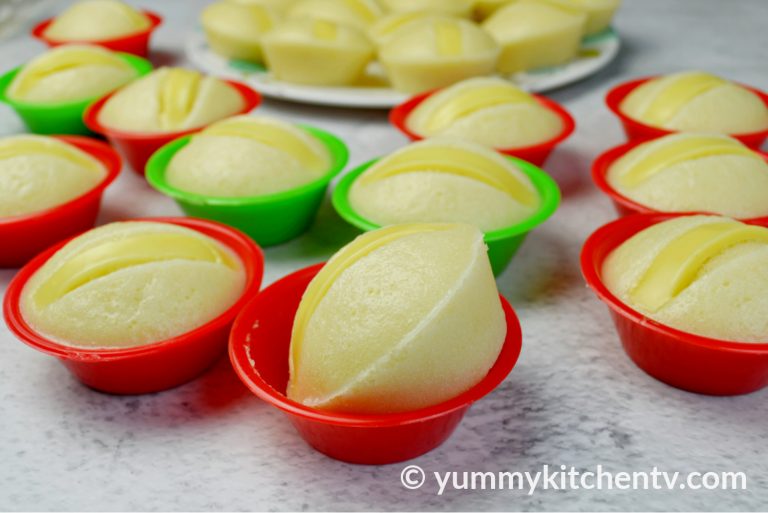
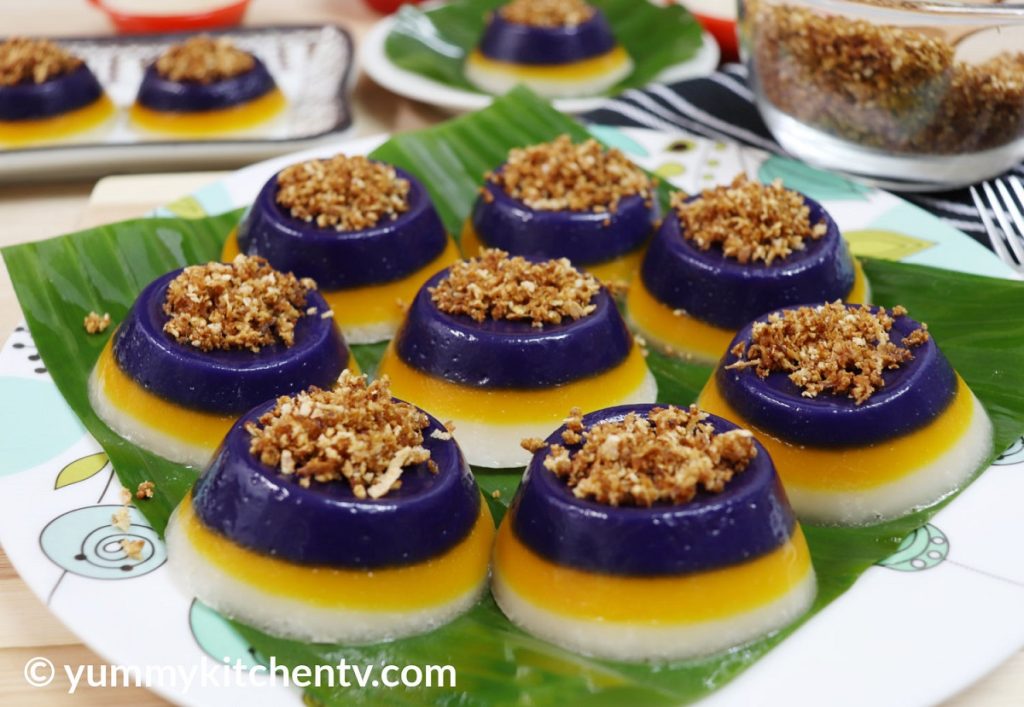
Sapin sapin is one of the most popular Filipino desserts or kakanins. It’s usually sold every Christmas event much like the Tikoy, but it can still be sold all year round. Sapin-sapin are usually cooked in a cake pan moulder, but with my recipe, I used a mini moulder. In this way, it is simpler to divide the sapin-sapin equally. What do we need to do to make this easy mini spain-sapin?
We needed the desiccated coconut and white sugar for our budbod toppings while for our sapin-sapin mixture, glutinous rice rice flour or malagkit powder, the rice flour or na bigas, the white sugar, the coconut milk, the condensed milk and the food coloring or flavoring. The process to make this recipe is really simple. First, we prepare the budbod toppings by cooking the desiccated coconut in a pan until it turns light brown. Stir it continuously to prevent burning. Add white sugar and continue cooking until golden brown. Still, stir it continuously to get the even color, then set it aside.
Prepare a large, clean and dry bowl for sapin-sapin. Combine the glutinous rice flour, rice flour and sugar and mix well. Add the coconut milk and stir gently until well combined. Add the condensed milk and mix well. Prepare another clean and dry bowl to transfer the mixture by straining it to remove the lumps. We don’t want any lumps on our sapin-sapin, as it should have a smooth, chewy texture. Prepare three small bowls to divide our mixture evenly or depending on how many layers you want.
Each bowl, we will add at least 1 tablespoon of food coloring or food flavor or depending on your preferred color, but for my recipe I used violet and yellow as this is the most common color used for making a sapin-sapin and leave the last layer as color white. You may also use a food flavoring where violet has a purple yum (ube) flavor and yellow has a jackfruit flavor. The white one is just plain coconut milk. But again, this will depend on your desired color you wanted to use. When the color has completely mixed, set aside the mixture and let it rest for 30 minutes before steaming for a smoother texture. While waiting for our sapin-sapin mixture to be set, prepare your molder and steamer. For your molder, brush each molder with oil to prevent it from sticking the sapin-sapin and put the molder in the steamer.

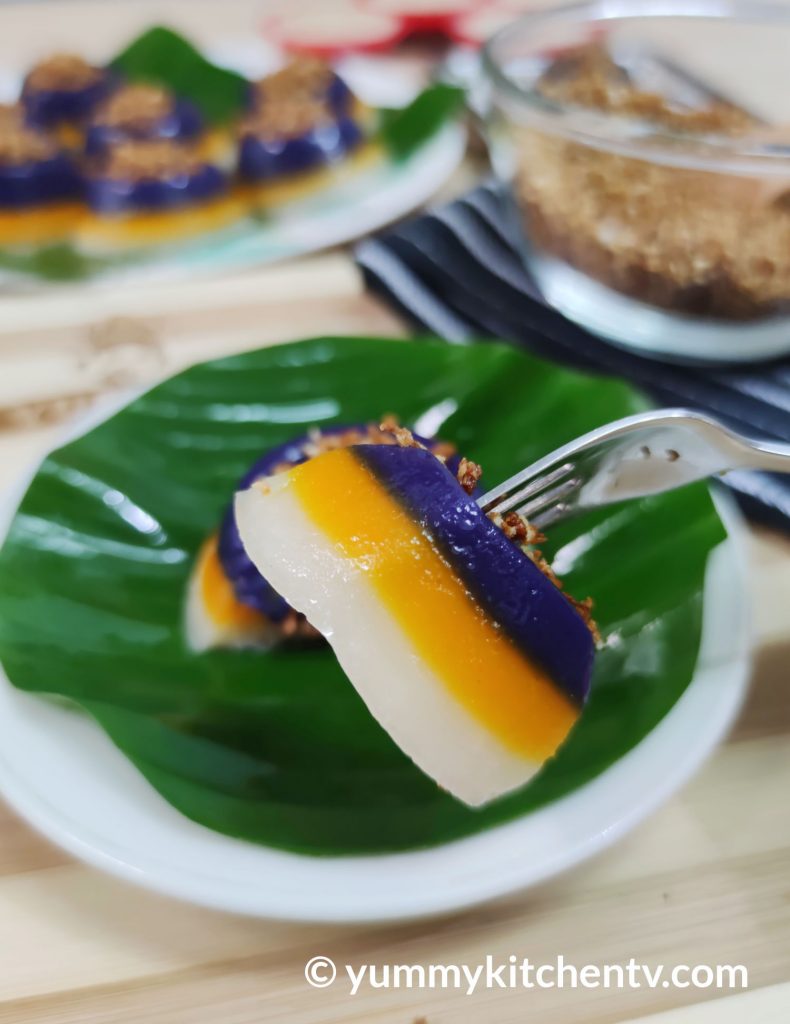
Prepare the steamer by heating it in advance. after 30 minutes, place the first layer, the violet color, in a molder for around 1-2 tablespoons. Make sure the layers are the equally divided. To prevent our sapin-sapin from dripping water due to moisture, I cover my lid with cloth. Steam the first layer in medium heat for around 8 minutes. After 8 minutes, check the sapin-sapin with a toothpick in the center of each molder. The toothpick has to come out clean. Once the first layer is cooked, we add the second layer, the yellow color.
To make it easier to add the second layer, I place the mixture in a squeeze bottle and place the mixture onto each molder. You can also use a measuring cup or an ice cream scooper or even a soup ladle if you do not have a squeeze bottle. After equally place all the second layer mixture, cover the steamer and steam it for about 10 minutes in medium heat. After 10 minutes, I added the last layer, the white color and steam it in a medium heat for about 15 minutes. If you’re using a larger molder like a pie pan, steam the sapin-sapin for a longer time.
If all the layer has been completely cooked, remove it from the steamer and let it cool completely before unmolding. When it’s completely cool, brush your plate with oil or use a banana leaf and brush it with oil to prevent sticking. Unmold each sapin-sapin and put it on a plate. Our cooked sapin-sapin is ready to serve. The recipe below shows how to prepare the Mini Sapin-sapin. Enjoy it!