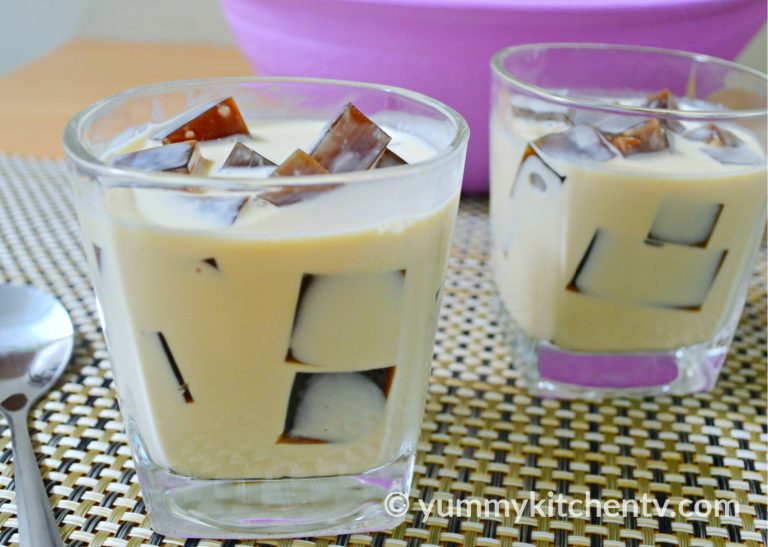
Coffee Ice Cream
Coffee ice cream is a popular ice cream where coffee granules is added to an icecream made with evaporated milk, all purpose flour, condensed milk, to add a refreshing coffee flavour that will rejoice the coffee flavour. It is topped with chocolate chips and coffee lovers will love it. This ice cream will not only keep you refreshed and chilled but will also help awaken your fighting spirit for you get through a summer day..


COFFEE ICE CREAM
I am a coffee person and I drink at least 4 cups of coffee every single day. I personally like my coffee hot. But my hot coffee drinking became a problem when summer came. The weather is too hot and I enjoyed my hot coffee less. I tried iced coffee but still my coffee satisfaction levels are not up. My mom, who is a coffee lover too, brought a store-bought coffee crumble ice cream as a snack. I ate a lot and I definitely liked it. That’s when I had the idea of making my own coffee ice cream.
A homemade coffee ice cream sounds easy to me after I learned how to make the basic homemade ice cream recipe. Never did I thought that I would fail this on my first try. For my coffee ice cream, I used the pure coffee powder which is available from our food counter. After I prepared my ice cream base, I was too excited to finish the ice cream so I poured the coffee powder straight into the ice cream base. And that caused my homemade one to fail.
My mixture froze and is now ready to eat. It taste like coffee ice cream, for sure. But there are random floating coffee power/granules which I think were not dissolved during the mixing process. Those granules gave sudden bits of bitterness which are not attractive to the tongue. From my experience, I learned the importance of proper coffee flavor extraction and incorporation for a homemade ice cream. I will share my tips and some reminders with you in this recipe.
HOW TO MAKE COFFEE ICE CREAM

Coffee Flavor
The coffee flavor which will be added in the ice cream batter will determine the success of the coffee ice cream. Adding the granules/powder straight to the ice cream base would cause some of the granules to float in the ice cream and gave sudden hints of bitterness. To properly extract a coffee flavor, heat evaporated milk in a can and wait until it is almost boiling. Add the coffee granules or powder into the evaporated milk and make sure to dissolve every bit of the coffee. The amount of the coffee granules will actually depend on how bitter you like the coffee ice cream. When the coffee is well-dissolved, remove the mixture from the heat and let the coffee flavor cool on the side.
A simpler version of the coffee flavor extraction which I commonly use in my coffee ice cream is just by dissolving the coffee granules or powder in ¼ cup of hot water. Remember to use just a small amount of hot water. This is because when you pour a lot of hot coffee water in the ice cream base, the mixture would be more liquid and there is a greater possibility of having ice crystals on your ice cream. These ice crystals would not make your coffee ice cream a smooth one. The disadvantage of using this version is this would lose creaminess since there was no milk used in the coffee flavor extraction.
A quick reminder before you start with your ice cream base: chill all the ingredients and utensils you will use, even the wire whisk or the metal mixer from a hand mixer. Chilling the all-purpose cream would allow it to age or mature before making into an ice cream base. The chilled cream would be easier to whip than the unchilled one. Chilling the utensils will help retain the cold temperature of the cream during the making of the ice cream base.
To start the ice cream base, grab a large mixing bowl. Pour the chilled all-purpose cream or whipping cream into the bowl and start to whip until it doubles its size. Even you will be using an electric mixer, this stage may take you a while and using a wire whisk will double all the work and time. Do not over whip the cream to the point that the liquid will separate from the cream fat. The cream fat is butter and you cannot return it to being whipped cream after.
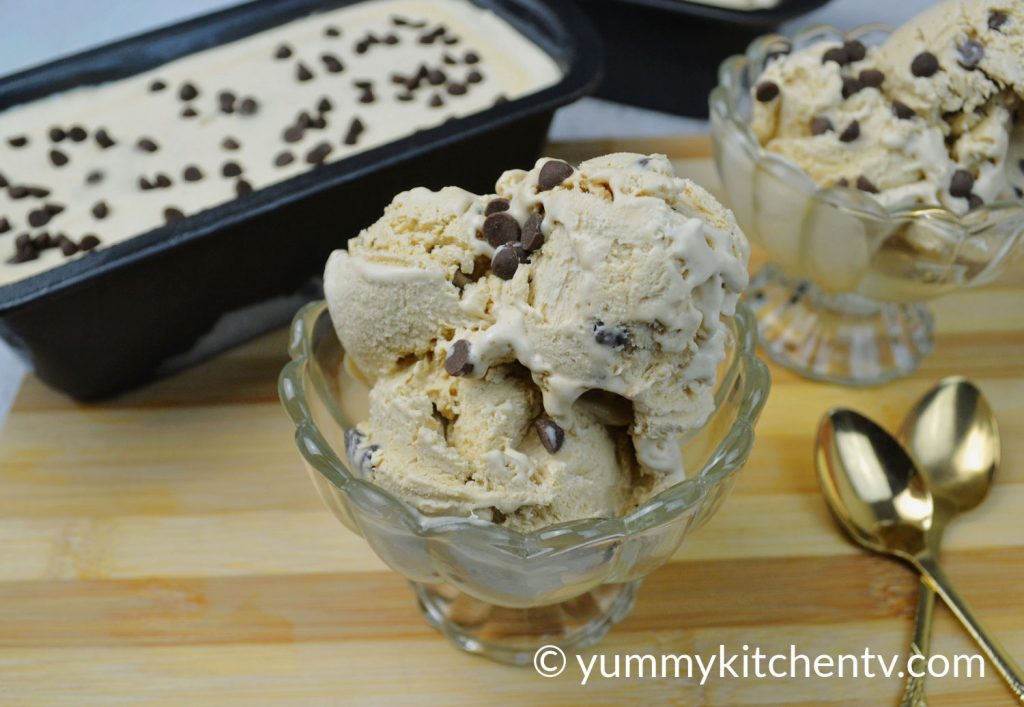
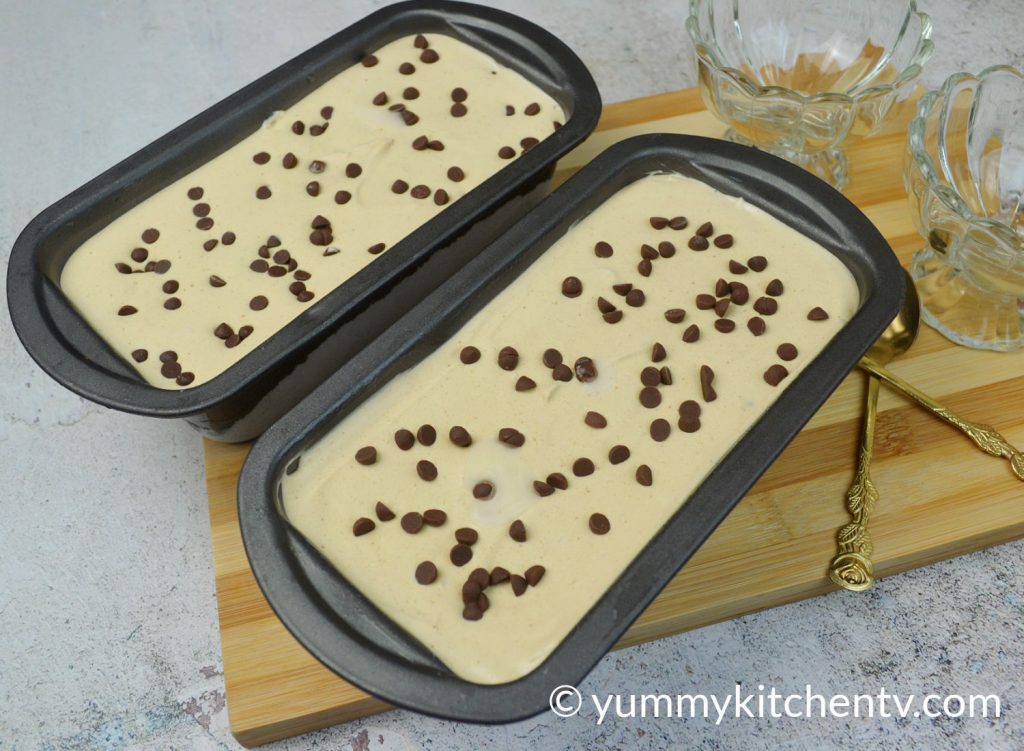
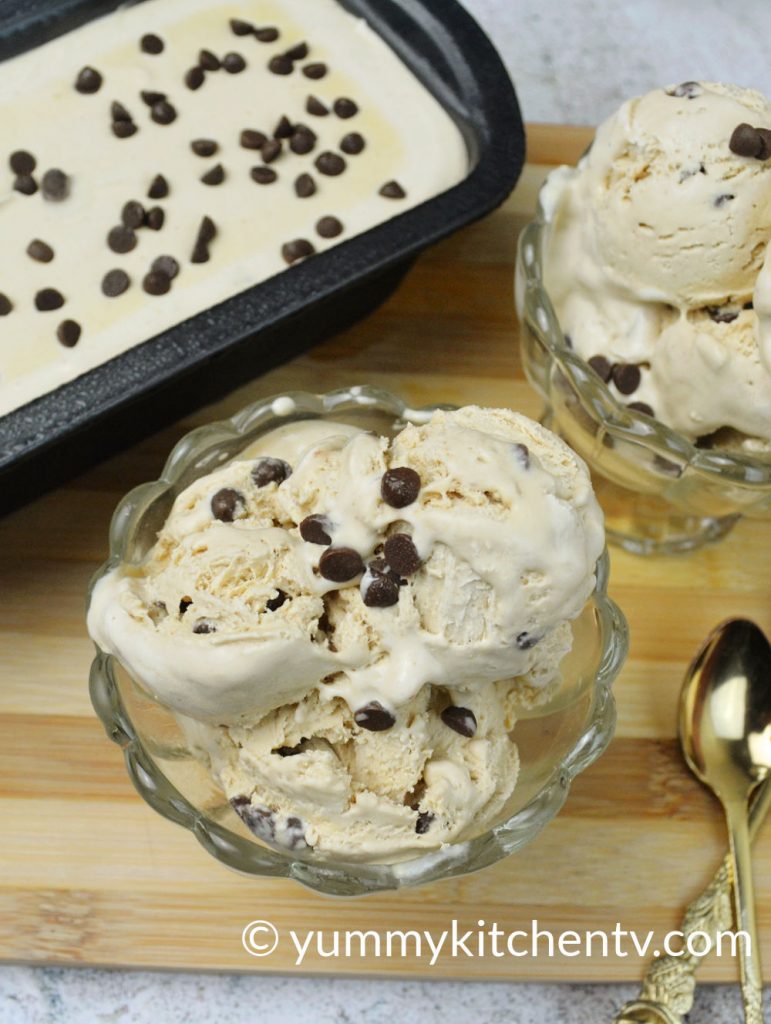
When the all-purpose cream is already double in size, pour the chilled condensed milk into the bowl and blend well. Add the coffee flavor you previously made and blend well. Taste the ice cream base as you gradually pour the coffee flavor to control the bitterness level. Let the ice cream base a little too sweet because when the sweetness lessens as the ice cream freezes. Add the toppings you want. In this recipe, I added some chocolate chips. Gently mix the toppings with the ice cream base. Pour the coffee ice cream base in a container. Put some topping on the top. Freeze for at least 8 hours. Serve chilled and enjoy!
Currently, I am satisfied with my homemade version. Another version of this you could try which also go with the trend is the dalgona coffee ice cream. You basically do the same steps, only that you pour dalgona cream at the top, middle and bottom part of the ice cream. Continue exploring on how you will decorate your ice cream and able to enjoy however you like.


Coffee Ice Cream
8
servingsIngredients
¼ cup evaporated milk
2 tablespoons coffee granules/powder
500mL all-purpose cream (chilled overnight) or whipping cream
300mL (1 can) condensed milk, chilled overnight
chocolate chips (optional topping)
Directions
- Heat ¼ cup evaporated milk under low heat until almost boiling. Add 2 tablespoons coffee granules or coffee powder. Stir and dissolve well. Set aside and let it cool.
- In a large mixing bowl, put your chilled all-purpose cream or heavy whipping cream and beat until it doubles. Add 300mL of chilled condensed milk and whisk until well-combined. Add the previously melted coffee in milk. Mix well until fully-combined. [Optional] Add your chocolate chips.
- Transfer the mixture into a tray or any freeze-safe container. Smoothen the top and top with chocolate chips.
- Freeze the ice cream for at least 8 hours.
- Scoop and serve chilled.